
Small Sync Errors Travel into Every Dialogue Cut
An incorrect picture-to-sound relationship follows the source into the edit. Dialogue lands late, microphone choices become confusing, and the lead editor inherits a problem that gets harder to isolate as cuts accumulate.
The working setup is familiar: separate camera picture, multitrack production audio, usable slates, and no dependable shared timecode. Avid Media Composer needs a deliberate synchronization pass before those sources become dependable editorial material.
Three jobs sit inside that preparation:
- Picture-to-sound synchronization establishes the relationship between a camera recording and production sound.
- Grouping provides access to simultaneous camera angles.
- Multigroup preparation organizes relationships across successive recording segments.
A single-camera take paired with production sound may need only a synced subclip. Multiple simultaneous angles call for a group. Camera stops and restarts introduce separate segments that require their own timing checks before multigroup assembly.
Inspect Rates and Name the Microphones Before Moving Clips
A production recording arrives with a mix, a boom, and several lavalier channels. Track numbers identify their positions, but the sound report and a listening pass establish which microphone belongs to which performer. That distinction needs to survive synchronization.
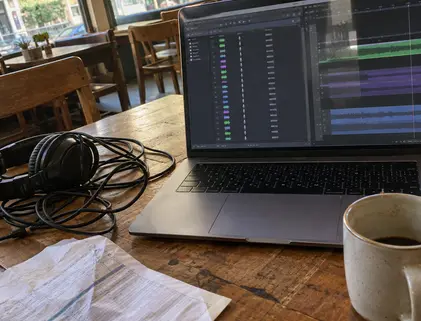
Inspect the sources before applying offsets or changing interpretation:
- Compare the project frame rate with each camera source’s frame rate.
- Check audio sample-rate metadata and recording durations.
- Retain source filenames and verify scene and take fields.
- Label the production mix, boom, and character-specific lavaliers explicitly.
- Compare ingest settings with documented production pull-up or pull-down.
A file’s declared sample rate describes its intended playback rate. The recorder’s physical clock determines the timing of the captured samples. Matching metadata therefore does not guarantee matching duration between picture and sound.
Changing sample-rate interpretation changes playback duration and pitch; proper sample-rate conversion preserves them. Establish which operation is needed before touching either setting. Preserve the originals, and retain each original source identifier alongside any corrected derivative.
Does the Slate Stay Aligned Through the Take?
The opening clap establishes a reference. What happens several minutes later determines whether a simple alignment will hold.
Locate the visible slate closure, then find the corresponding transient in production audio. When camera reference audio exists, compare the same event there. Without a usable clap, choose a distinct sound with a visible cause or an unmistakable matching event in the reference recording.
Check another event in the middle and one near the end. Classify the result before correcting it:
- Constant displacement: an alignment correction is the likely next step.
- Growing displacement: investigate rate interpretation or recording-clock drift.
- A sudden jump: inspect for a recording interruption or discontinuity.
Waveforms need context. Microphones at different distances receive the slate sound at different times, so matching their peaks can introduce an apparent picture-sync error. Judge alignment against visible contact and listening as well as waveform shape.
A slate-locked opening with a drifting tail points toward a duration relationship that moving the whole recording will leave unresolved.
Correct Offset and Duration Before Group Assembly
Timing correction belongs upstream of grouping. A clean order keeps a coarse alignment decision separate from fine audio positioning and duration repair.
- Establish the picture reference. Identify the camera event that anchors the relationship.
- Align the coarse offset. Bring the corresponding production-audio event into position.
- Refine audio timing. Check the installed Media Composer release’s documentation for its supported subframe audio-adjustment workflow before choosing commands or shortcuts. An ordinary frame nudge remains a frame-sized move.
- Recheck later events. Return to the middle and end to distinguish remaining offset from progressive drift.
For progressive displacement, check interpretation settings and documented production speed changes before applying a duration correction. Ordinary sample-rate conversion preserves duration. Drift repair requires correcting the interpretation error or deliberately changing duration, with pitch preservation chosen appropriately.
Keep the Mix and Isolates Together
Apply identical timing treatment to the production mix and isolated microphones so their existing sample relationships remain intact. Record whether the correction changes offset, duration, or both; include original and corrected durations when duration changes.
A repair made only in a preparation sequence may not reach the sources used by grouping, so build and inspect one finished group before processing the remaining takes.
Keep Camera Identity Separate from Recording Segments
Camera A stops while production sound continues, then restarts. The restart creates another source segment requiring its own relationship to sound. Naming both segments simply “Camera A” conceals that distinction.
Use names such as “Camera A Segment 01” and “Camera A Segment 02” to keep angle identity separate from recording continuity. For a single camera and production recording, a synced picture-and-sound subclip can supply the required source relationship. Simultaneous camera choices call for a group; successive segments require multigroup preparation.
Follow the dependency order:
- Establish corrected source timing.
- Prepare the sync references required by the selected grouping method.
- Create a test group.
- Inspect its sync reference, a later event, and available audio channels.
For an In-point-based method without dependable shared timecode, place matching sync marks on the same real-world event in each participating source. Arrange the production mix and isolates deliberately, and verify whether switching camera angles also switches audio.
Will the Finished Groups Survive Real Editorial Cuts?
Validation starts in a fresh sequence, using edits from the finished groups. The lead editor will cut those sources, so the test needs to exercise their actual behavior.
Make representative edits at the beginning, middle, and end. Place cuts on both sides of camera restarts and multigroup boundaries, including intervals where picture or production sound stopped. Switch angles while checking that the intended production-audio selection stays intact.
Audition the production mix separately from its contributing isolates. Playing both together can produce doubled dialogue or comb filtering. Then listen to individual microphones for missing tracks, changed sync, and unexpected switching. Check picture gaps separately from sound availability.
Package consistently named bins with a handoff record identifying corrected sources, original source identifiers, correction types, and special handling.
Would the lead editor’s first angle change preserve both the chosen microphone and the dialogue sync?




Your Thoughts
No comments.
Share Your Opinion