

Quick Nav
- Why Workflow Matters Before the First Cut
- Source Context: What This Archive Teaches—and What It Does Not
- The Four-Part Mental Model for a Premiere Pro Workflow
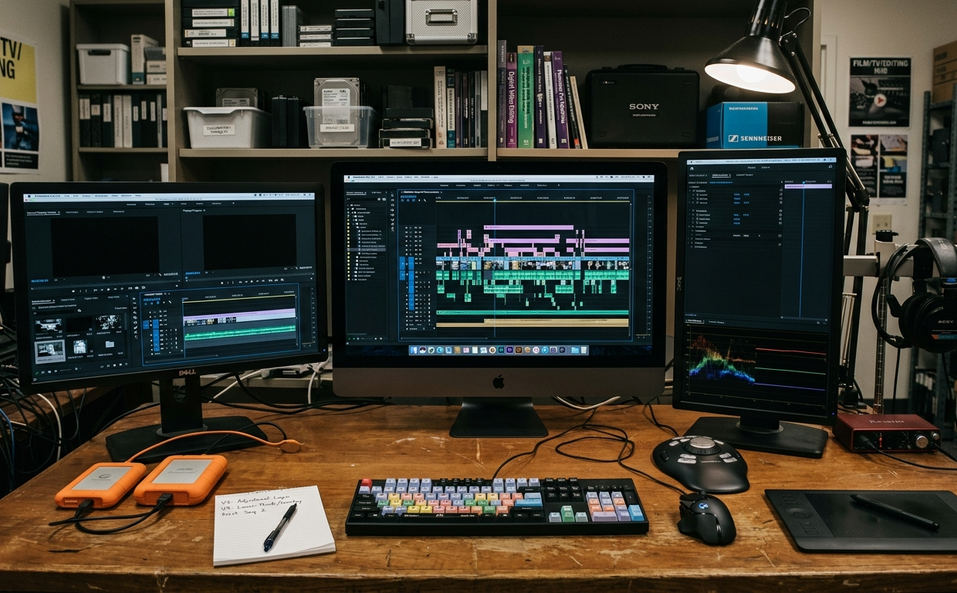
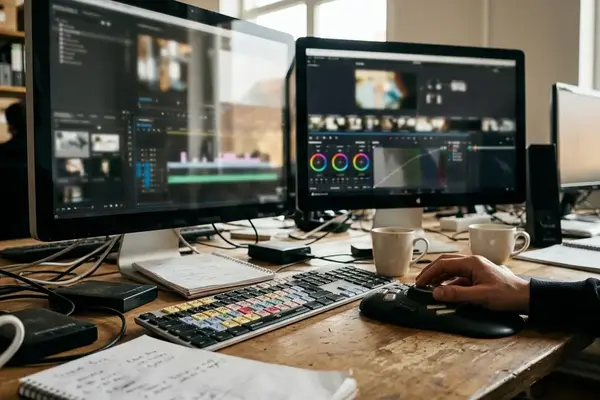
- Step 1: Organize Media, Drives, Bins, and Sequence Settings
- Step 2: Build the Timeline in Passes, Not Panic
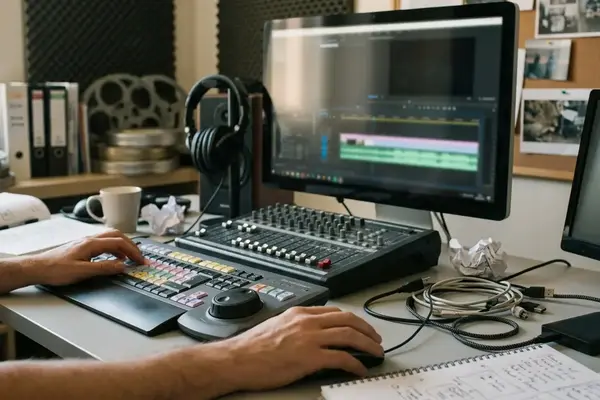
- Step 3: Prepare Graphics for Transparency, Motion, and Safe Frames
- Step 4: Review, Export, and Hand Off Without Surprises
Why Workflow Matters Before the First Cut
Premiere Pro looks like a cutting tool, so beginners naturally reach for the razor, trim handles, and timeline shortcuts first.
That is usually the wrong first move. The better question is simpler: what must stay stable while the edit changes? Media paths need to stay stable. Sequence settings need to stay intentional. Graphics need to behave the same over dark b-roll, bright walls, and export compression. If those basics drift, creative work turns into repair work.
For a short student or web piece, reserve the first half hour or so for setup: create the project folder, confirm footage frame size and frame rate, make bins, and import test graphics before building the main sequence. That small pause prevents the classic mess: renamed camera folders causing offline clips, still images stretched by the wrong pixel interpretation, title layers sitting outside safe composition areas, and exports made from an older sequence version.
Field Note: A clean timeline can still export the wrong file if the editor leaves an old in/out range around a short review segment.
The practical approach is context first. Understand the media, standards, graphics, and delivery target before the sequence becomes precious. Premiere Pro rewards that kind of discipline more than it rewards early polish.
Source Context: What This Archive Teaches—and What It Does Not
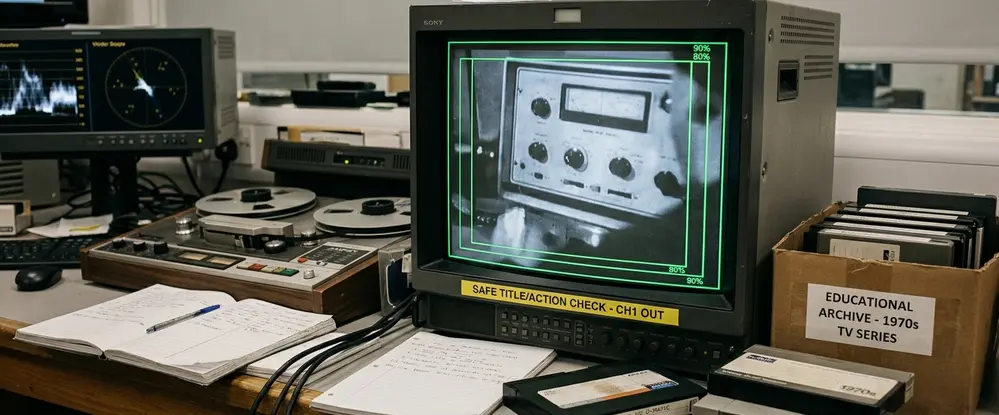
The historical anchor here is an October 20, 2000 archive report by Doug Lindeman. Read it as a training snapshot, not as a current Premiere Pro manual.
Reporting confirms the material sits in a legacy environment built around Video Symphony training, Adobe After Effects 4.1 and 5.0, Final Cut Pro, Photoshop, Illustrator, NTSC/DV preparation, and broadcast graphics concepts. The names matter because they show the teaching context: Lindeman appears as author and student reviewer; James Rankin is presented as an instructor and owner of LST Digital; Jonathan “J.P.” Purpich is tied to Photoshop and Final Cut Pro instruction; Video Symphony is described as a Burbank-based training facility founded in 1994 as an Avid training facility. Its training identity at 731 N. Hollywood Way belongs to a wider post-production education world that also touched tools such as Softimage 3D.
Citations
For modern interface details, use the official Adobe Premiere Pro User Guide. For this article’s workflow framing, the archive supports principles and historical context, not current button-by-button instruction for the modern editing interface.
That distinction matters. The G4-era workstation assumptions, NTSC/DV preparation, non-square pixel awareness, studio-monitor review, and broadcast-safe title placement are not today’s default operating conditions. Still, the habits underneath them hold up: know what the pixels are doing, keep alpha channels clean, think in key frames when graphics move, and do not place essential text on the edge of the frame just because the canvas lets you.
The Four-Part Mental Model for a Premiere Pro Workflow
A Premiere Pro workflow is easier to control when it is treated as four connected layers: source media, project structure, timeline construction, and finishing/export.
Layer 1: Source Media
Source media includes camera folders, separately recorded audio, stills, logos, captions, music, and reference files. This is where many problems begin quietly. A camera card copied without its sidecar files may import differently. A logo that looks sharp in a browser may not survive scaling in a 4K sequence.
Layer 2: Project Structure
Project structure includes bins, naming rules, autosave location, sequence versions, and scratch or preview locations. This layer does not make the edit better by itself. It makes the edit legible when the director asks for yesterday’s version or another editor opens the project after lunch.
Layer 3: Timeline Construction
Timeline construction covers track layout, clip labeling, markers, nested sequences, adjustment layers, and temporary placeholders. The timeline is not just where cuts happen; it is where decisions remain visible.
Layer 4: Finishing and Export
Finishing/export includes relinking, render checks, graphics inspection, audio review, caption or title review, export presets, and playback of the exported file. Treat this as part of editing, not a clerical task at the end.
The archive’s After Effects emphasis still fits modern Premiere Pro practice. Editors need to understand how transparency, compositing, and animation decisions affect the cut. A lower-third title needs editable text and safe placement. A raster image needs enough pixel detail for scaling. A line-art graphic needs clean edges when animated.
Step 1: Organize Media, Drives, Bins, and Sequence Settings
Start like an assistant editor who expects someone else to inherit the project.
- Create the top-level project folder.
- Add folders before importing: 01_Project_Files, 02_Camera_Media, 03_Audio, 04_Graphics, 05_Motion_Graphics, 06_Exports, 07_Reference, and 08_Autosaves.
- Copy media without renaming camera folders blindly.
- Check representative clips for frame size, frame rate, audio sample rate, and sidecar or metadata files.
- Build bins that match the real production.
- Create the first sequence only after the footage and delivery target are clear.
Bin names should describe the shoot, not the editor’s mood. Interviews, B-Roll, Scene Audio, Music, SFX, Stills, Logos, Titles, Motion Elements, Exports, and Old Sequences are plain names, but they work because they reflect production reality.
Sequence settings deserve the same directness. If the source footage defines the job, create the first sequence from a verified master clip. If a platform, broadcaster, classroom screen, or post supervisor defines the format, create the sequence from those delivery specs instead.
Important: NTSC/DV workflows could involve non-square pixels, so a circle in a graphics program might not appear as a circle after interpretation on a video display. Modern editors see different versions of the same problem when footage, graphics, and sequence settings do not agree.
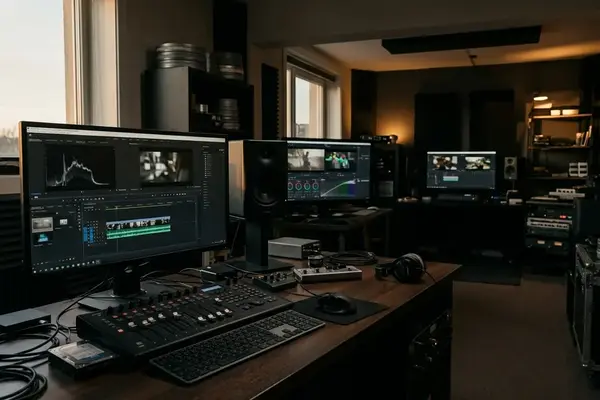
Step 2: Build the Timeline in Passes, Not Panic
What should the first timeline prove?
Not perfect timing. Not final music. Not color. The first timeline should prove that the piece has a shape worth refining.
A pass-based edit keeps the editor from treating every trim as final too early. Use this order: assembly cut, structure pass, performance pass, pacing pass, audio cleanup pass, graphics pass, and final review. The assembly cut places usable material in story order without solving every trim. Unresolved sections should be marked, not hidden.
Keep Tracks Predictable
Track discipline is boring in the best possible way. Keep dialogue on A1–A3, natural sound or room tone on A4–A5, music on A6–A7, and temporary sound effects on A8. Do not bury narration under duplicated camera audio just because it came in with the clip.
For picture, keep primary footage on V1, b-roll on V2, temporary titles on V3, motion graphics on V4 or above, and adjustment layers clearly labeled. This layout is not sacred. It is a starting point that makes problems visible.
Mark Decisions Instead of Guessing
- NEEDS_BROLL
- CHECK_NAME_SPELLING
- AUDIO_POP
- GRAPHIC_PENDING
- RIGHTS_REVIEW
Markers protect attention. They let the editor keep moving through the pass without pretending a missing decision has been solved.
Step 3: Prepare Graphics for Transparency, Motion, and Safe Frames
Graphics preparation is a preflight step, not a rescue step. Classify every visual asset by behavior before it lands in the timeline: pixel image, editable text, vector-style line art, transparent overlay, or animated element.
Pixels, Lines, and Scale
A raster image is pixel-based imagery, the kind of material editors associate with Photoshop work. It is made from fixed picture elements, so enlarging it too far can soften edges or reveal compression artifacts.
Vector-style artwork, the kind associated with Illustrator, is line-based and mathematically defined. It usually stays cleaner when scaled if the workflow can interpret it correctly. That last phrase matters; clean artwork can still look poor if it is flattened, rasterized too small, or handed off without the right settings.
Alpha Channels and Key Frames
An alpha channel carries transparency information: what should be visible, what should be semi-transparent, and what should be hidden. Dirty alpha edges show up as pale halos, dark fringes, or unwanted rectangular backgrounds.
A transparent lower-third that looks acceptable over dark b-roll may show a pale fringe over a white wall or sky shot.
Key frames are the basic control points for animation. A key frame stores a property value at a point in time, such as a lower-third’s starting position and its resting position roughly a half-second later. The same idea applies to scale, opacity, rotation, and many other layer properties in After Effects and similar tools.
Safe Frames Still Matter
Keep names, subtitles, legal text, and essential logos away from the extreme edge of the frame, even when the final delivery is digital rather than broadcast. A vertical social cut made from a horizontal classroom edit needs different safe-edge judgment; simply scaling the finished sequence can crop names, captions, or product text.
Step 4: Review, Export, and Hand Off Without Surprises
The finish starts with version control. Confirm the timeline is the intended sequence before touching export settings.
Premiere Workflow Preflight and Finish Checklist
- Relink offline media.
- Remove disabled test layers.
- Check nested sequences.
- Inspect titles and captions.
- Review transitions.
- Listen through problem audio areas.
- Confirm the export range.
- Export the file.
- Watch the exported file from first frame to last frame.
Render previews when they help judge timing or effects. Do not treat preview rendering as proof that final export settings are correct.
For beginners, audio review can stay qualitative: listen for clipped words, sudden music jumps, missing room tone, left/right imbalance, and dialogue buried under music. Those checks catch real problems without turning the session into a metering lecture.
Export settings should come from the destination: classroom playback, review link, social upload, archive master, captioned version, or handoff to another post-production artist. Copying settings from another project may work by accident, but it does not teach the editor why the file is being made that way.
MPEG-2 belongs here only as a historical comparison from older desktop publishing and video-standard discussions. It is not a universal modern recommendation.
Bottom Line: Faster editing starts before the first cut. Keep media stable, structure the project clearly, build the timeline in passes, prepare graphics before they fail on screen, and review the exported file as if it were the version the client will actually see.

Your Thoughts
No comments.
Share Your Opinion